The Best Showit Hack for Photographers
If you’re a photographer who blogs all of your sessions, you probably have certain layout that you use for your blog posts over and over again. Well, here is my favorite Showit hack for photographers! It lets you create a template for your posts. You can fill in this template with new info each time, which means you’re not wasting time designing the same blog post layout for every session.

Step One- Create a Template Like Normal
Open up a new blog post, and start putting in all of the elements you would need. Just as if you were making a real blog post, except you’re not really going to be writing anything or putting in any images yet.
For example, all of my session blog posts follow this same layout:
- Title
- The couple’s names as a header
- The type of session and date of the session as a H3 header
- An image
- Paragraph 1
- A gallery
- Paragraph 2
- A gallery
- Paragraph 3
- An image
So my template looks like this
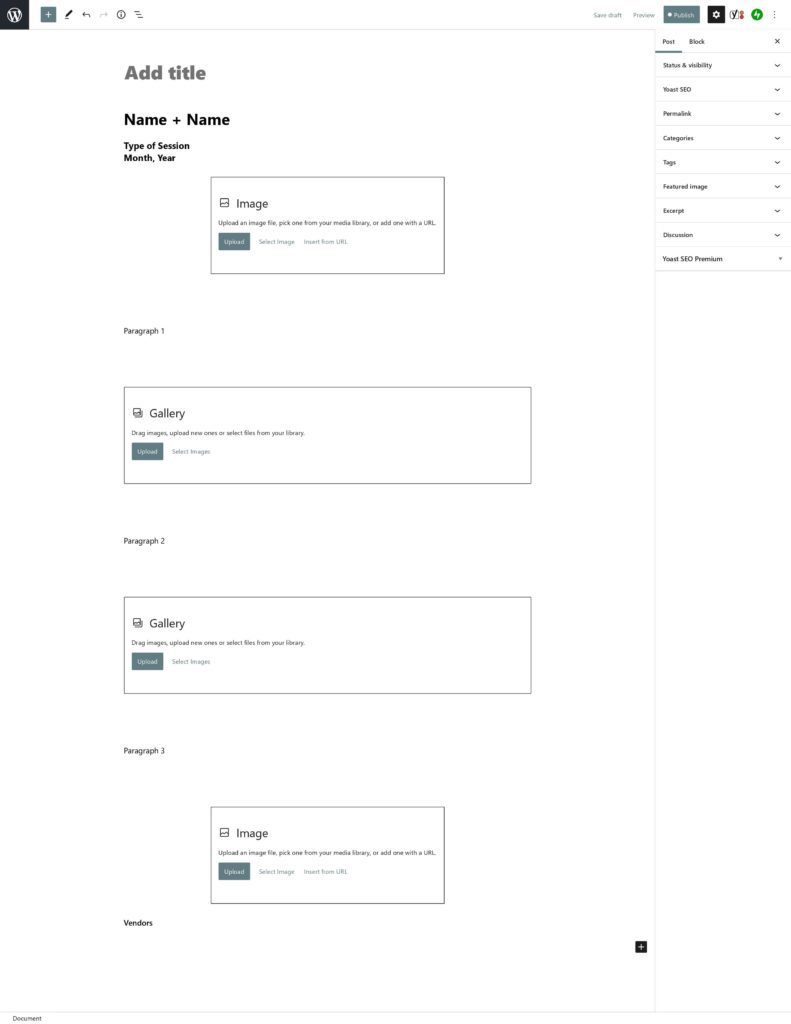
Tip! Don’t forget to use spacer blocks! Spacer blocks are a great way to make sure your content isn’t too squished on your site. They can be added into your template too!
Step Two- Group All the Blocks Together
Click into the very first block you made (right under the title!) Scroll down to the bottom of your template. Then, holding shift on your keyboard, click on the very last block. Once you click on the last block, you should see an outline form around every block in your post.
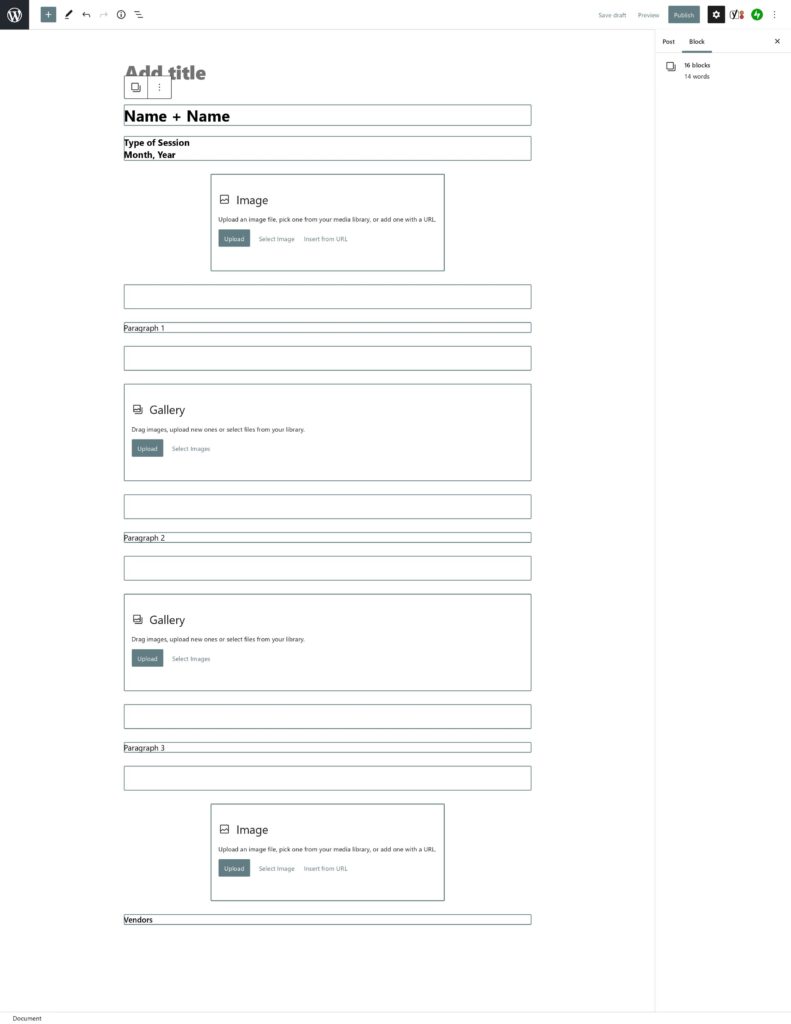
Make sure all of the blocks are still selected. At the top, you should see a little menu bar floating with 3 dots on the right hand side. Click on the three dots, and then click “group”. After you click on that, you should see an outline around your entire post (except for the title).
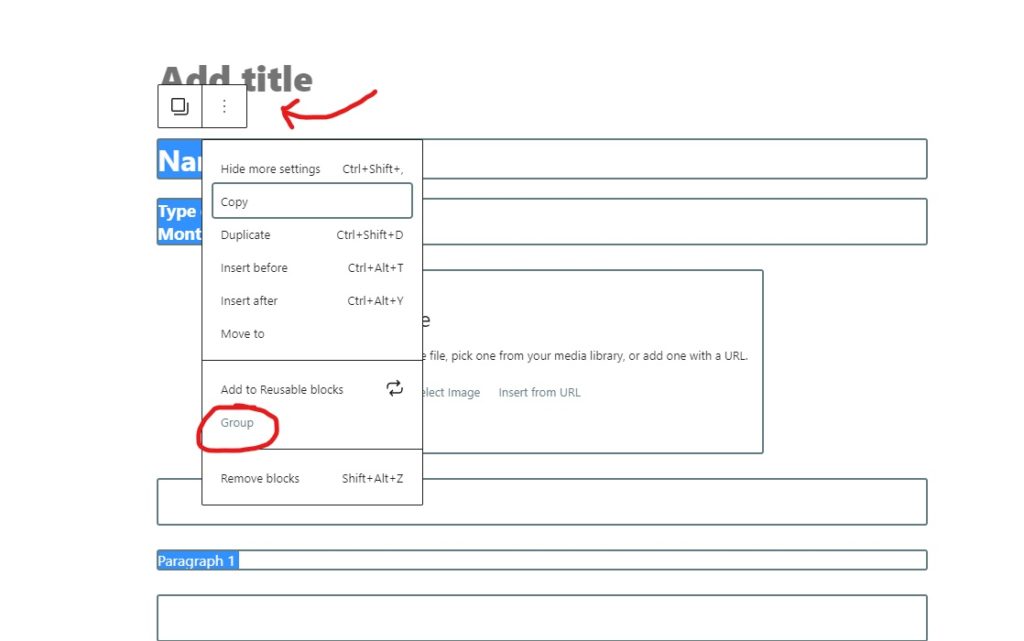
Step Three- Make Your Blocks Reusable
That menu bar should still be there, so click on the three dots again and this time select “Add to Reusable Blocks”. It will ask you to name this block group, I named mine Session Template.
Using Your New Showit Photographer Hack in a Post!
Perfect! You’ve made a template now with the exact layout you’ll need for every blog post! The hard part is done. Now here’s how to use it in a new post without it screwing up your original template.
Making a New Post- Using Your Reusable Blocks
When you open up a brand new blog post, you’ll see the very first thing it lets you do right under the title is either start typing, or click on the little plus sign (you may have to hover your mouse around to find the plus sign if it doesn’t appear right away). Click on the little plus sign, and search for the reusable blocks you just created!
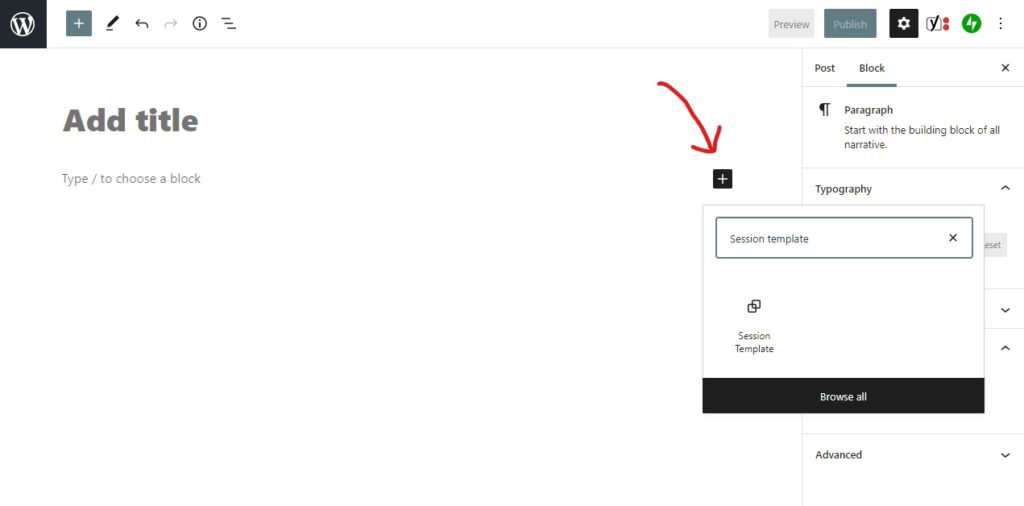
Your template will generate into your post, but you can’t use it yet. Any changes you make to it at this stage will change your original template. Notice it still has the outline around your entire post? To get rid of that, click on the icon of the overlapping squares at the top.
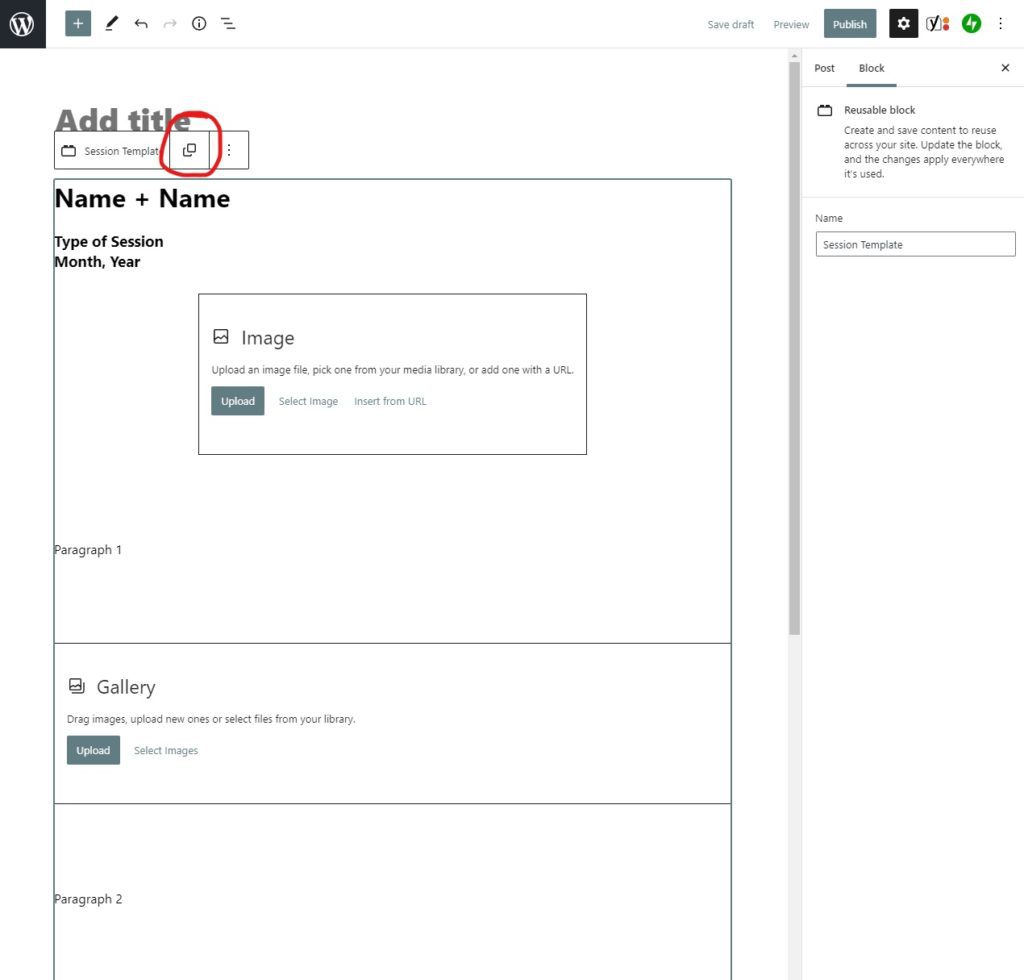
The outline is still there, no worries. Now you’re going to click on the three dots on the right, and click “Ungroup”.
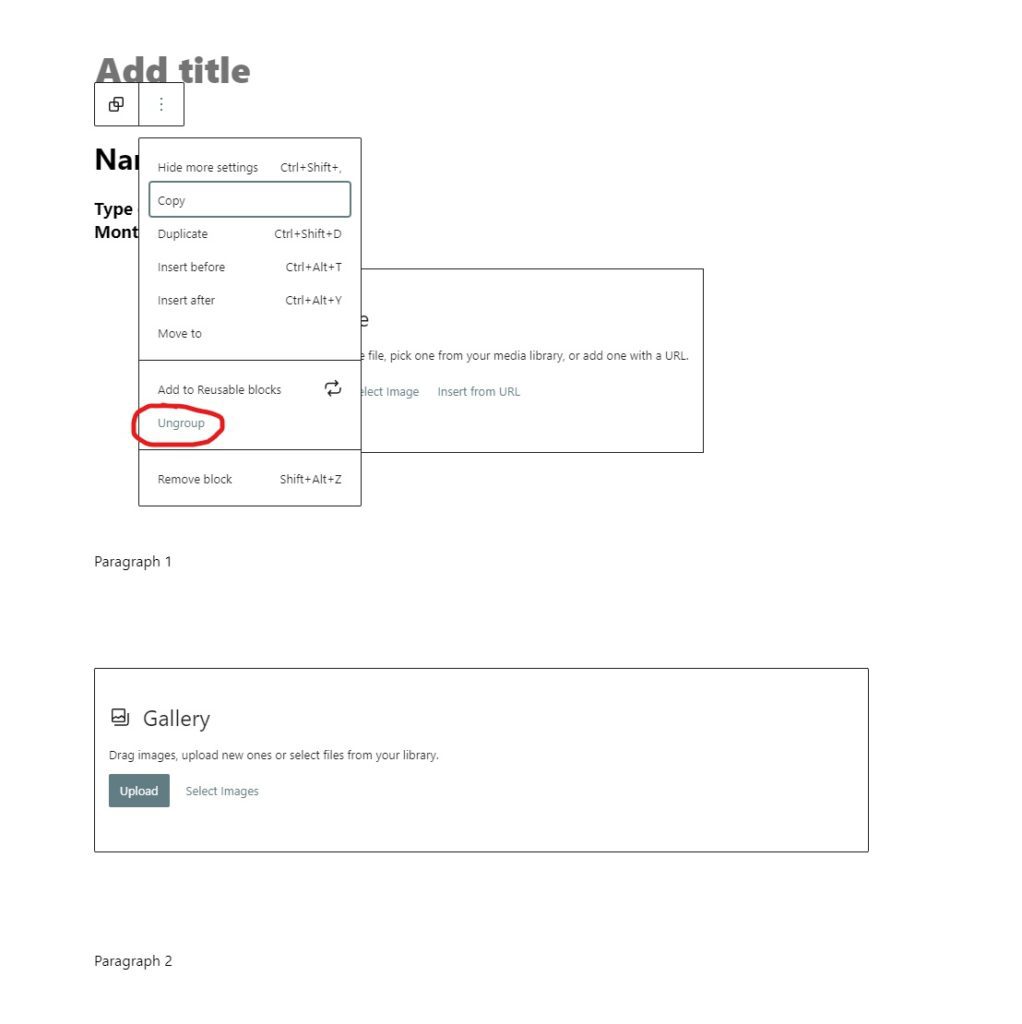
Now you’re good to go! There shouldn’t be an outline around your post at this point, so now you can use this new post for your next session! Just update your template with your current session’s photos and writing and publish like normal!
Now You Know My Favorite Showit Hack for Photographers!
These templates can be used an unlimited amount of times. Now that you’ve created your reusable template, you’ll just have to remember to search for it, click on the squares, and ungroup the blocks each time you make a post. Once you get used to it, it will take like 3 seconds to set it up each time. It’s a whole lot quicker than recreating a page from scratch each time you want to post a session! I hope you can see why this simple Showit hack for photographers has made my life so much easier.
Food for thought: Do you use a different template for different types of sessions? Create more than one template! You could make a maternity session template, a wedding template, or anything else you can think of. Go crazy!
-
YOU MIGHT ALSO LIKE...


Comments