Make the First Page of Your Blog Different Than the Rest in Showit
UPDATE – OCTOBER, 2021
Showit recently released a new update that lets you show different canvases on the first page of you blog with just one click. Any canvas you want to show on the first page of blog, but not on the rest, click this option.
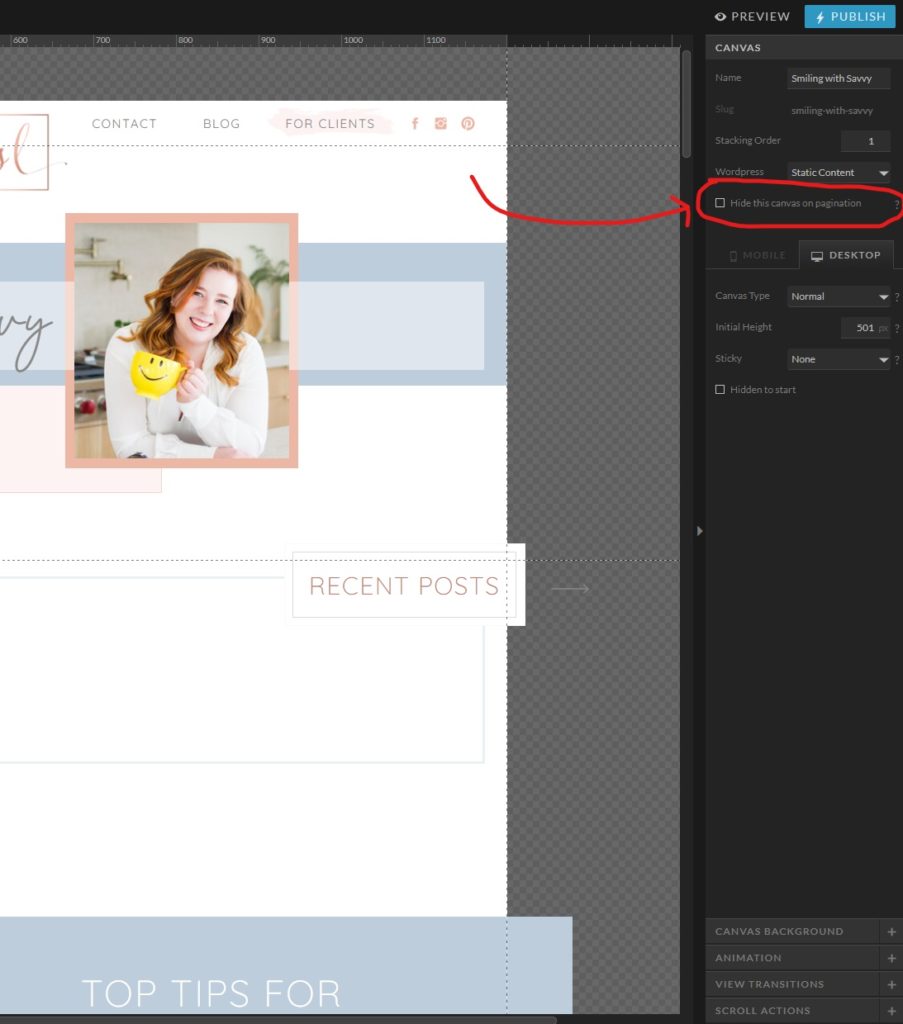
The rest of this post will show you my method before this feature was released.
I’ll say right now- Showit does not make it easy to make the first page of your blog different than the next pages. This guide will include a lot of workarounds, but it is possible in the end. I’ll walk you through it step by step.
How it Works: We’re effectively going to create a page with “featured posts” (aka: your most recent blog posts). That means both the new page and the first page of your blog both have the same posts showing up, so we’ll make your newly created page link to page 2 of your blog to create a seamless experience with each blog post showing once- in order.
Why Might One Want This? Good question. Some of the reasons I’ve personally run into are maybe you want a pop-up form on the first page of you blog, but you don’t want it popping up and annoying people every time they click to see more posts. Maybe you want a big ol’ long page of info and introductions on the first page, and it would kind of suck to scroll down through all that on every page. Maybe you just want a different design, who knows.
Step 1: Figure Out How Many Posts Show Up on Your Regular Blog Page
To make sure the new page and the second page work seamlessly together without skipping or repeating any posts, you’ll need to know exactly how many posts show up on a regular blog page. Go to your live site, and count how many blog posts show up on a single page.
Step 2: Create the Page You Want as Your First Blog Page in Showit
The easiest way to do this is just to duplicate your regular blog page and then tweak it to have the necessary changes after. Make sure that this new page contains the exact same amount of posts as a regular blog page does- otherwise you may find it skipping some blogs or duplicating some.
On a regular blog page, you can make just one or two canvases containing your posts and WordPress will automatically duplicate it for as many posts as you like. Not so with this page. You need each one laid out specifically. This means if you want 10 blog posts showing up on each page, you need to 10 unique canvases showing on your page for each one. Really make use of that “duplicate canvas” button for this task.
Quick Note: Before you duplicate all of these post canvases, make sure everything in them is inside a canvas view. Even if you only have one post per canvas. Just make a canvas view and put everything inside of it. If you already have everything inside canvas views, great! You’re good to start duplicating.
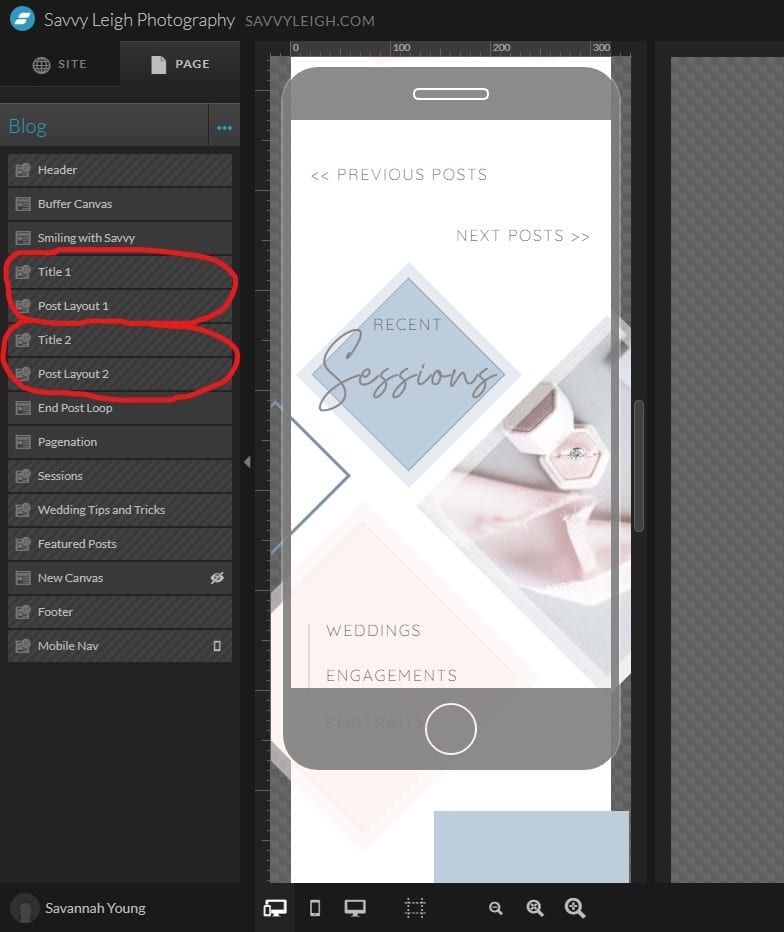
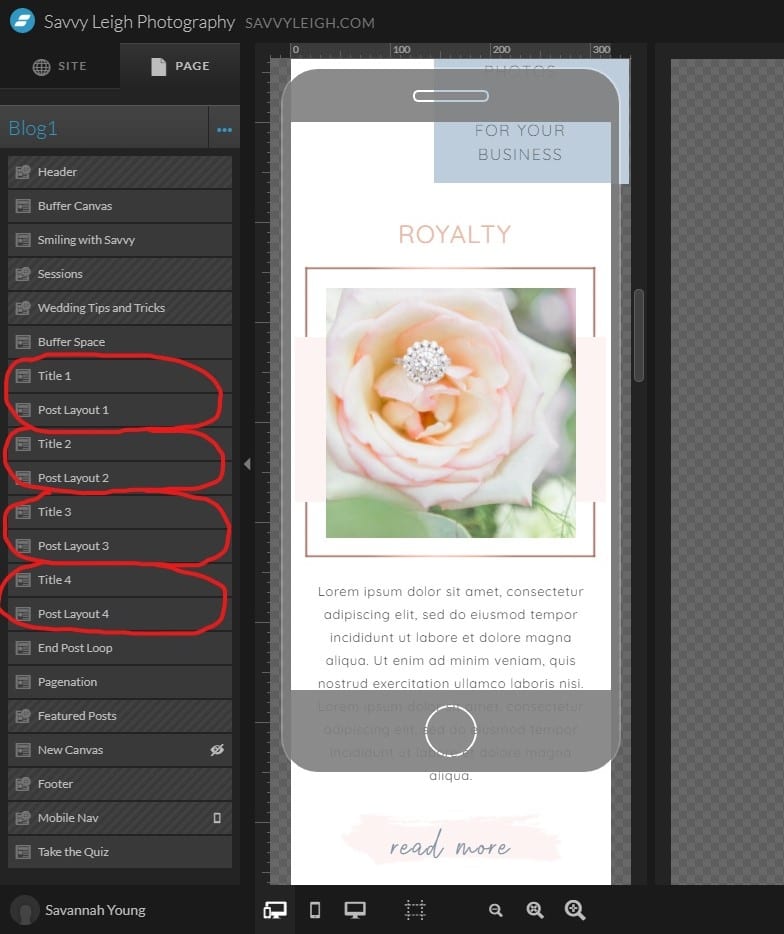
Keep in mind I have 4 blog posts for each page.
Step 3: Set Each Canvas for “Post View Lookup”, and Offset Accordingly
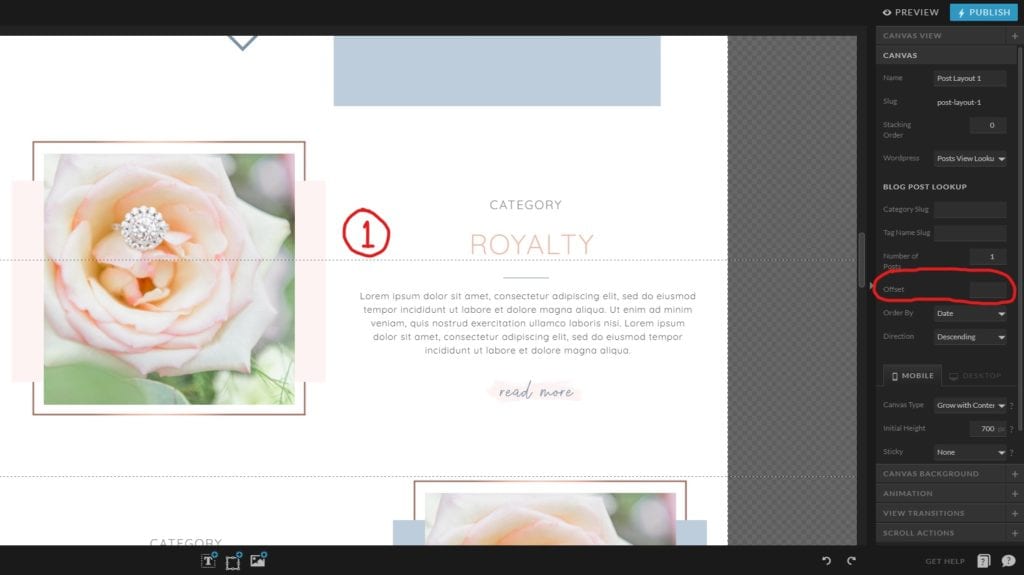
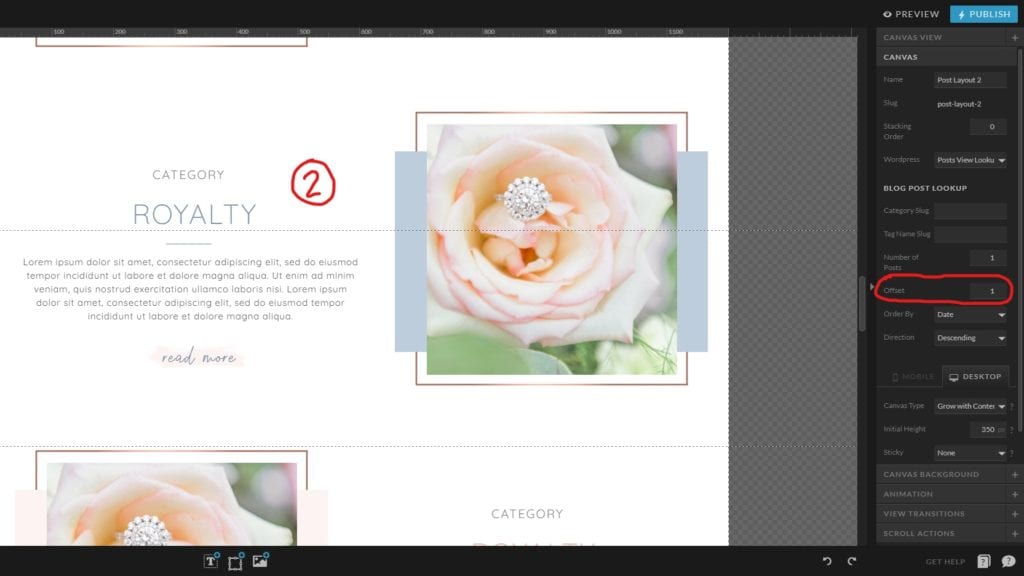
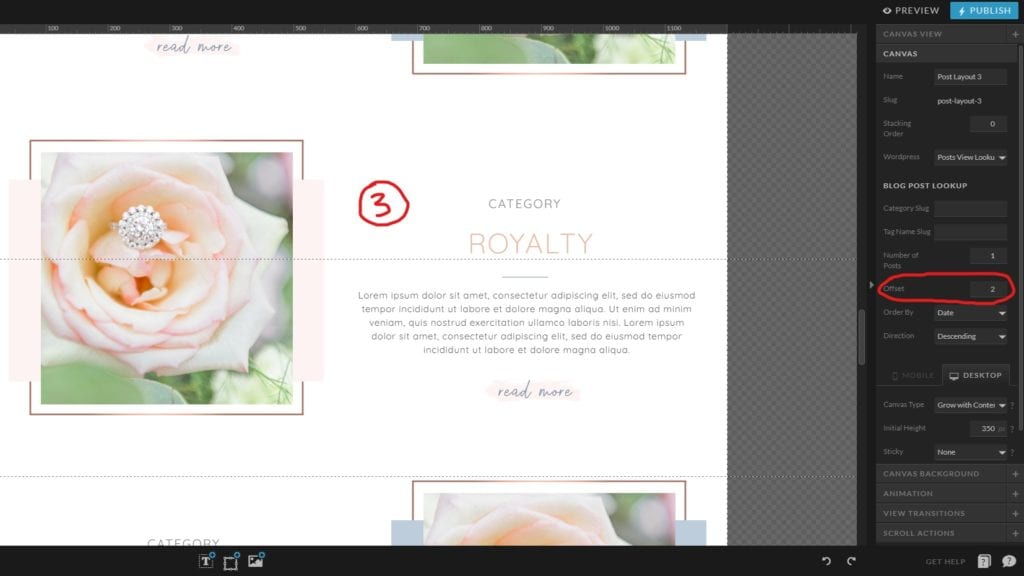
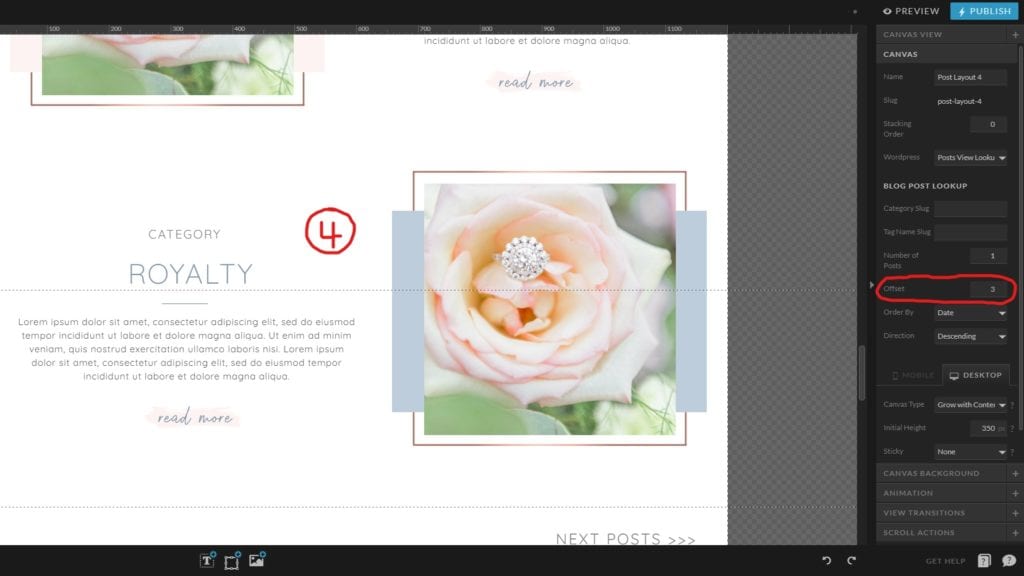
In the Canvas tab on the right, make sure you select “Post View Lookup” from the WordPress drop down menu. Do not fill in a category slug or a tag name slug (unless you’re wanting to pull from a specific category).
Showit’s help guide on Create a Featured/Recent Posts Section might come in handy here.
Your first post on the page should not have anything where it says “Offset”. Your second post should be set to offset by 1, your third post should be set to offset by 2, and so on allllll the way down the page. This makes sure each post shows up in order.
See how I set up each of my 4 canvases by clicking on the photo below.
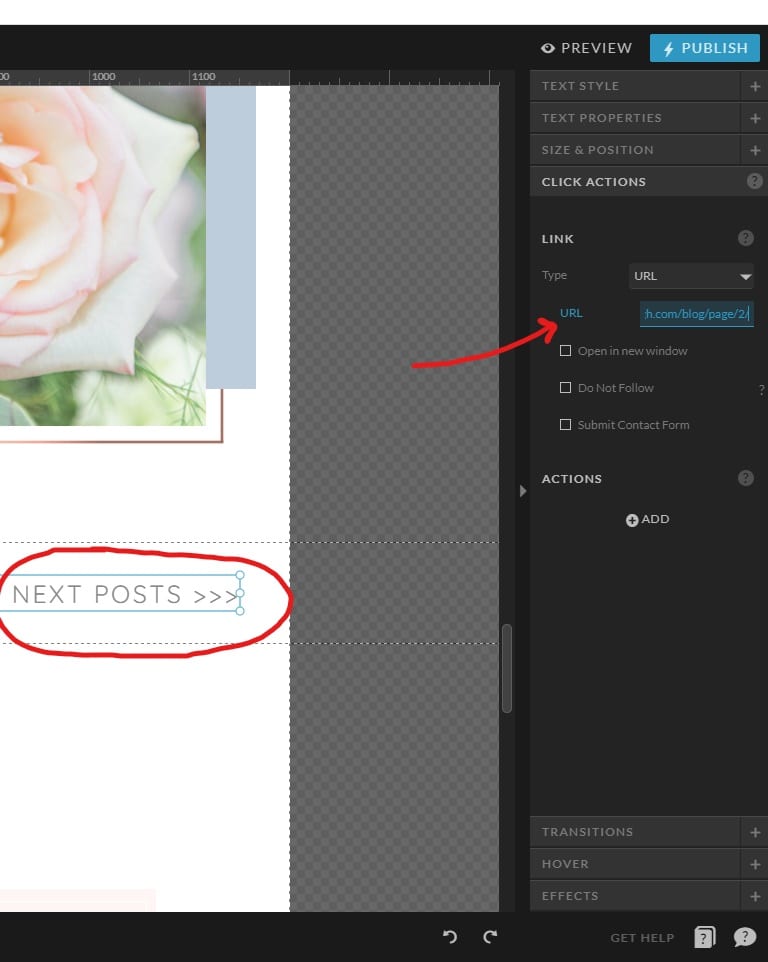
Step 4: Make Sure Your ‘More Posts’ Button Links to Page 2
First, go to your live site, to your regular blog that exists right now. Go to page 2. Copy that URL.
Now in your new page in Showit, if you duplicated your regular blog page, you should have some kind of button that says “read more posts” or “older posts” or “next page” or whatever. Click on that, and in the “Click Actions” tab on the right, paste that URL for page 2 you just copied.
Step 5: Choose a URL and Set Up Your Showit Page With the Correct Settings
The first page of your blog will have to have a different title- it can’t just be titled “Blog” or else it will show your old blog page. I named my first page “Blog1” but you could choose a totally different URL if you’d like! Maybe like “The Blog” or something. Just make sure it’s not the same URL as your regular blog, and make sure you’re paying attention to the slug it gives you.
After you’ve renamed your page, click on the name and make sure it’s labeled as a “Page” on the right where it says WordPress Template.

Step 6: Make a New Page in WordPress
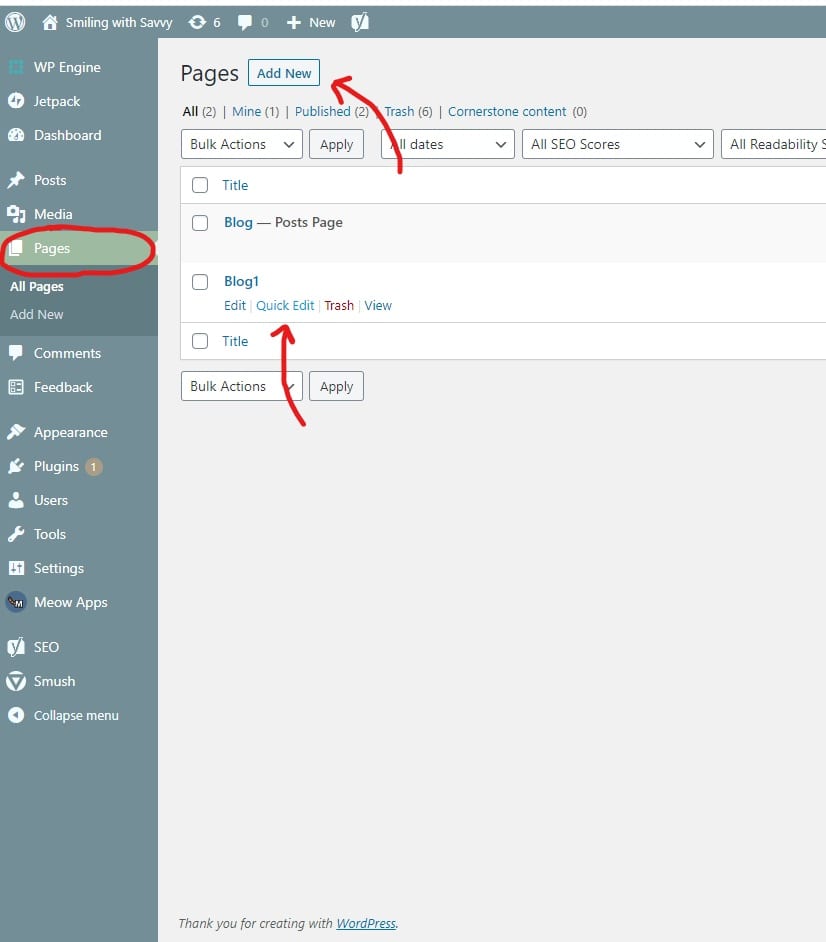
Go to your WordPress account and click on “Pages” on the left side. You should see a couple of these already exist, and a page titled “Blog” should already be there. Don’t mess with it. Instead you’re going to create a new page and title it with the brand new slug you just created (so I added a page titled “Blog1”).
Now go back to the pages tab, find that page you just created, and double check that it has the right URL. Just click on “Quick Edit” and you can see that the slug should match up exactly with the slug you chose in Showit.
Publish Everything!
You should be all set! Don’t forget, all the links throughout your site that used to take customers to your “blog” now need to be changed to link them to your new first blog page instead.
You can check out how I’ve used this technique on my site and my client’s sites here and here.
Running into any problems? Let me know in the comments below and I may be able to help you out!
-
YOU MIGHT ALSO LIKE...

Comments