Let Your Clients Rate and Review You With Flodesk
If you’ve ever wanted to get some feedback from your clients and went to your Flodesk account only to realize that the option does not exist- this is for you. I’ll go through how you can create 5 stars (or smiley faces!) that your clients can click on to either leave your a review, or send you some personal feedback. Letting your clients rate and review you with Flodesk is an awesome easy way to gather fresh reviews and keep tabs on how you’re business is doing through the eyes of your customers!

What you’ll need: A website (you’ll be creating two different pages), and a Flodesk account (skip to the bottom for a discount code).
Step 1: Create an Email Asking People to Review You
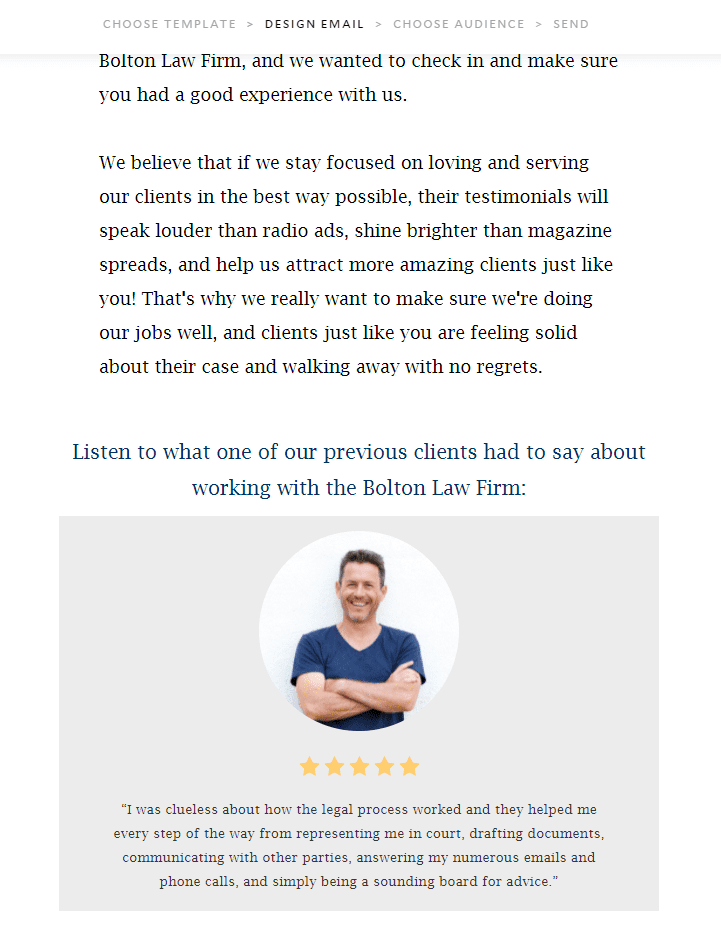
This one is pretty self explanatory. Make an email thanking your clients for trusting you with whatever service or product you provide, and ask them to rate their experience. It’s also a good idea to put an example of a good review already in there so they get in the zone to write something awesome! Flodesk already has a layout to put in a good review your business already has.
Step Two: Create a “Link Bar” and Paste in Your Symbols
Create a link bar, and on the right side in the “Block” tab make sure you have 5 links- one for each star.
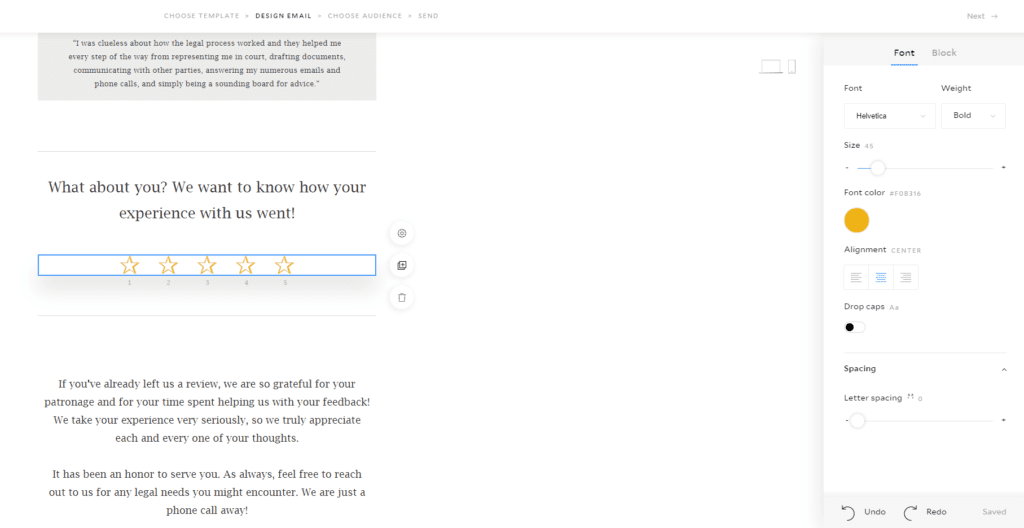
Flodesk doesn’t have stars that you can just automatically plug in, so you’ll need to find a typeable star that you can copy and paste in the link bar. I used this symbol: ✰ but you can find many other stars and other typeable shapes here. Once you’ve pasted in the star, you can change the font color and size of it to your liking.
Here are some other stars you can copy and paste: ☆ ★ ⍟ ⭐ ✯
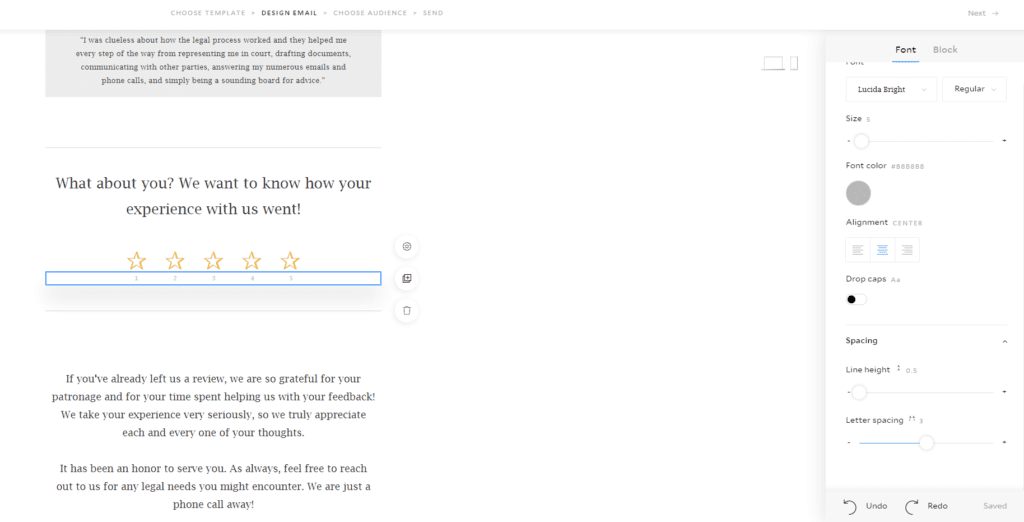
If you’d like to, you can also create a text block with the numbers 1-5 right below the stars so it looks like the stars are labeled. You may have to mess with the spacing for the text block so you can make sure the numbers are aligned correctly. I had to put 6 spaces in between each number for mine to line up right. Below is a screenshot of my exact settings for my link bar and my text block!
Note: You could also do this with smiley faces! Here’s a place where you can find copy-paste smileys. Here’s some you can copy right away: 😄 🙂 😢
Step 3: Create Two Webpages – One for a Good Result, One for a Bad Result
In order for you to actually document who’s happy and who’s not, you need to create at least two webpages. One happy page (for a 5 star review), and one unhappy page (for a less-than 5 star review).
Note: If you wanted to document the exact star that people clicked on, you could make 5 different pages- one for each star
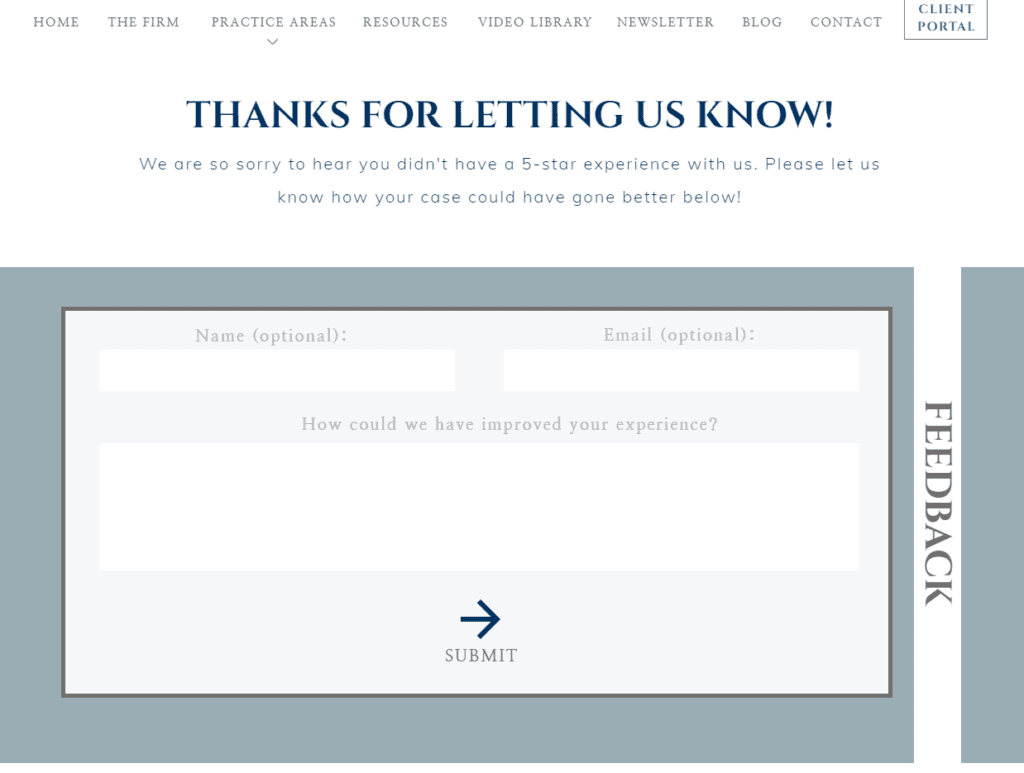
UNHAPPY PAGE: Your unhappy page should say something like “We’re sorry you didn’t have a 5 star experience with us!” Now you can leave it at that, but I also like to put in a little website form that goes directly to the business so people can give negative feedback and explain why their experience was sub-par. This makes people less likely to go and blast your business online, because they get their complaints heard and listened to. Plus you also get valuable feedback on how to improve!
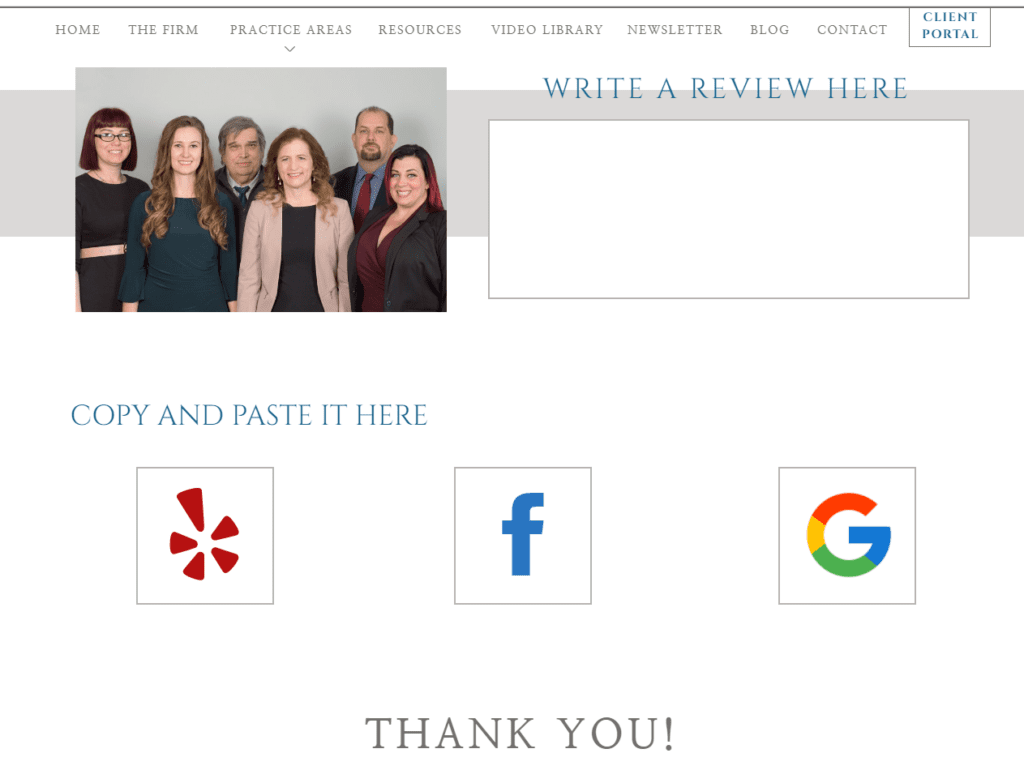
HAPPY PAGE: Your happy page is where you want clients to review you! Put in a short message at the top that says something like “That’s what we love to hear!” Talk them up as a client. Then give them the links to go and review you on your favorite platforms.
I always like to give them a place to write their review, and then copy and paste it to all the different social media platforms. I feel like this is just a great way to get good reviews in as many places as possible! You can totally leave this part out though if you wanted to. Just make sure you’re giving them an easy way to review.
Step 4: Link Up Your Stars (Or Smileys!)
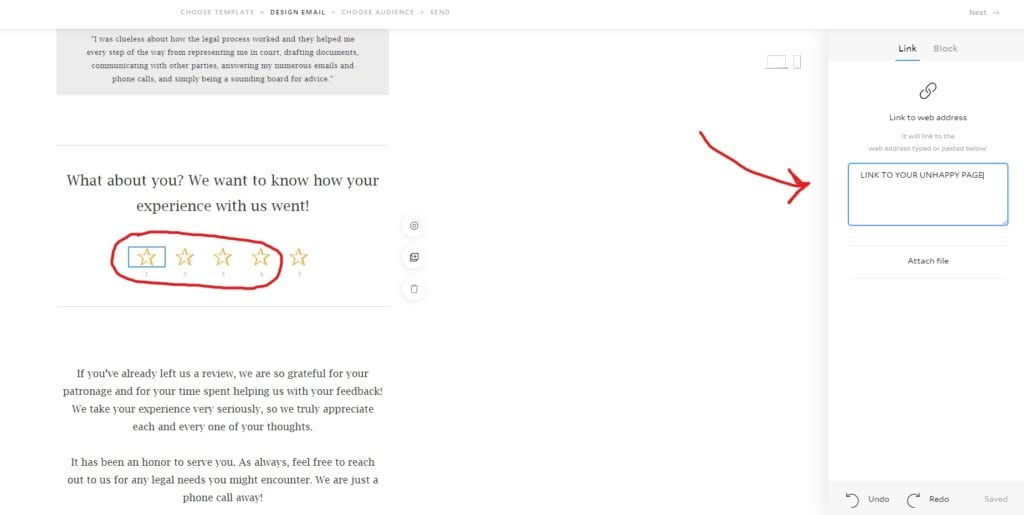
Copy the URL for your new UNHAPPY page. Make your first four stars link to your unhappy page in Flodesk. All four of these stars need to be linked.
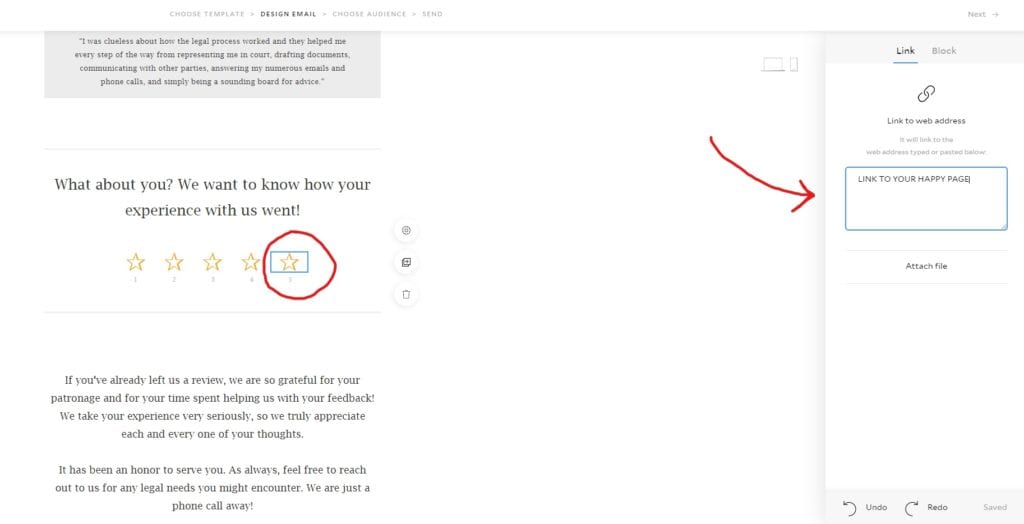
Copy the URL for your HAPPY page. Make your last star link to the happy page in Flodesk.
(Optional) Step 5: Create a Workflow that Segments Unhappy and Happy Clients
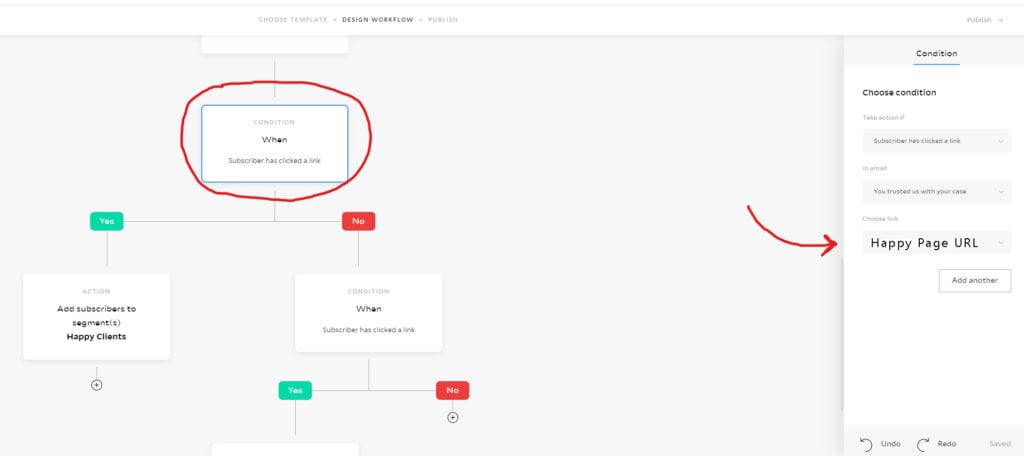
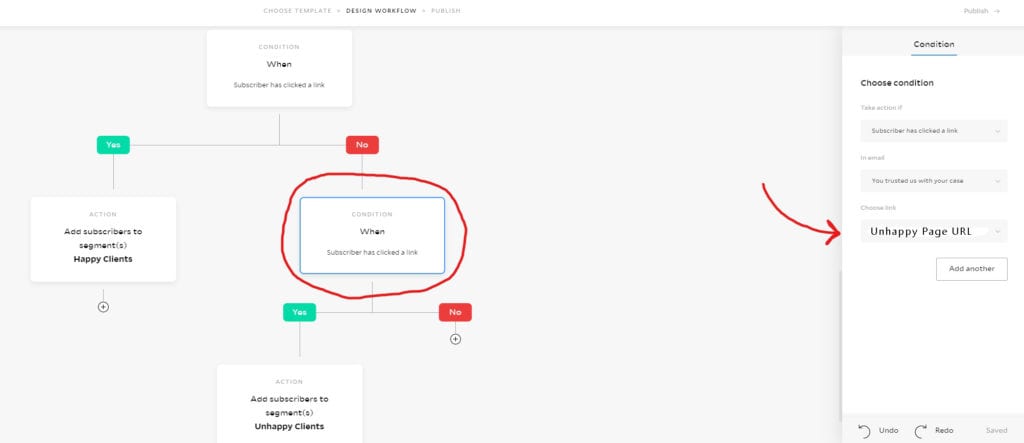
You totally don’t have to do this, but I like to break my subscribers into segments based on what star they clicked. If they clicked on stars 1-4 they get labeled as “Unhappy Clients” and we basically just stop sending emails to them altogether. If they click on star 5 they get labeled as “Happy Clients” so we know who to reach out to for more testimonials, or maybe they get first dibs on new products or something.
Our workflow goes like this: Clients get added into a segment for “Past Clients” → Flodesk waits two weeks, then sends them the email asking for them to rate us → Flodesk waits a week for them to click, and then segments them depending on what they clicked.
Check out the exact flow below.
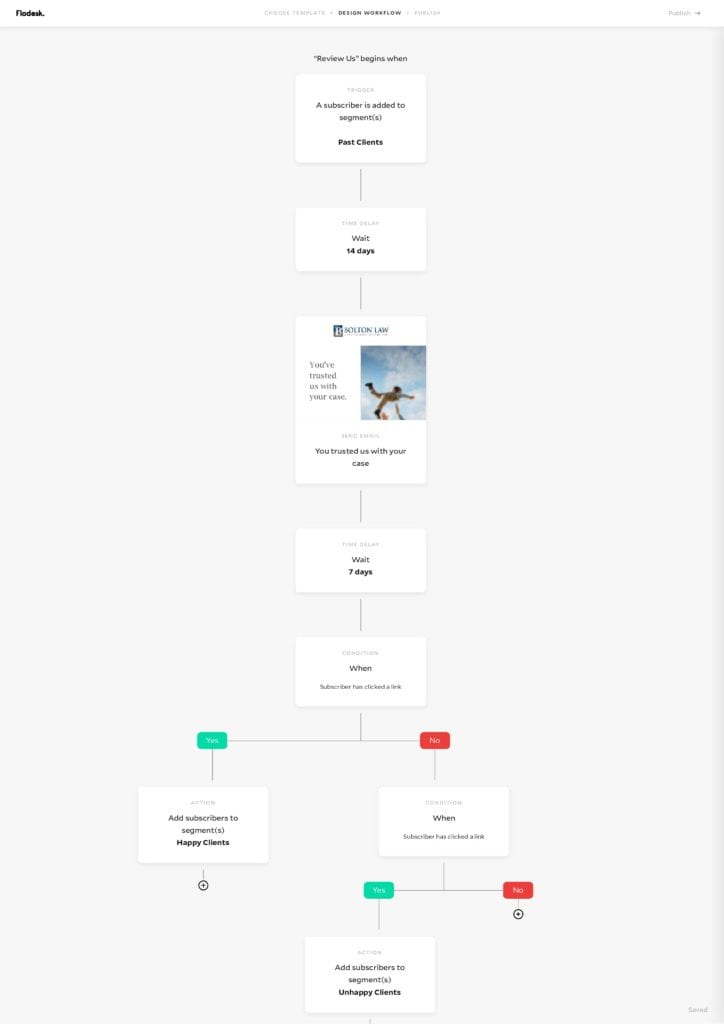
Here some more detailed screenshots. This shows how I set up the links inside of the workflow.
Now, You Can Let Your Clients Rate and Review You With Flodesk!
Now, you should have an easy system that lets your clients rate and review you with Flodesk. Plus, a workflow that segments them based on what they clicked! Reviews are the lifeblood of any business, so I hope this article helped you gather more amazing words from your clients!
Bonus! New to Flodesk? You can get 50% off for your first year! Just use the code SAVVYLEIGH.
Have you used this method for you own business? Let me know how it went! If you’ve run into any problems you can comment them below. I may be able to help!
-
YOU MIGHT ALSO LIKE...


Comments