Maintaining Your Showit Site
A Simple Guide to Maintaining Your Showit Site
Hey there! This guide is meant for my website design clients. If I have not designed your site and you’re not a client of mine, you may still find help in this article, but be aware this is catered specifically to clients of mine.
This is not meant to be a comprehensive guide, this guide is only to show you how to make maintenance tweaks and simple updates to your site. If you would like more detailed information, I frequently post “how to” articles about sites in showit, so feel free to visit my blog for more tutorials.
Logging Into Showit and Changing Your Password
The first thing you need to do is login to Showit and change your password. Right now, your password is the temporary password that was emailed to you when your site was completed. (Can’t remember what that password is? Email me here.)
– Go to https://app.showit.co/
– Log in using your email address and the temporary password
– Click on your name in the bottom left corner
– Click on “View User Profile”
– Click on “Settings” in the top right
– Here you can change your password and your email if you wish.
*If you have not yet purchased a Showit subscription, you will need to do this by clicking on your name in the bottom left corner and clicking “Manage Subscription”.
Logging Into WordPress and Changing Your Password
The next thing you need to do is login to wordpress and change your password. Right now, your password is the same temporary password that was emailed to you with your site.
– Go to https://yoursite.com/post
– Log in using your email address and the temporary password
– Click on “Users” in the lefthand tool bar
– Click on your email address
– Scroll down until you see a button that says “Generate Password” and click on it.
– A random password will appear, just delete it and type in your chosen password.
– It might have a checkbox below that says “Confirm use of weak password”, if you see that, click on the checkbox to confirm it.
– Click “Update Profile” at the bottom to confirm it!
A Quick Overview of Showit
The Difference Between WordPress and Showit
Showit
Showit is where your site is designed, it tells your page what to look like. If you’re wanting to change what your website looks like, or change a regular page (not a blog post), this is where you go.
Showit: https://app.showit.co/
WordPress
WordPress is where your blog lives. If you’re posting something regularly, or you have a newsletter or something, you’re going to go to WordPress (https://yoursite.com/post). You don’t have to worry about what anything looks like here. You just type in the right words for your post, and it will do the rest for you automatically.
WordPress: yoursite.com/post
How to Make A Blog Post
– Go to https://yoursite.com/post
– Click on “Posts” in the left hand column.
– Click on “Add New” at the top, near the left
– Type in your content or add media by clicking on the little plus sign. If you want to add text, click on the “paragraph” button. You can add a photo by clicking on the “image” button. Add a lot of photos with the “gallery” button. There’s all kinds of things you can add, so don’t be afraid to test out some new stuff!
***Remember, DON’T worry too much about what it looks like here. You are only putting in the information.
– You can see what your post will actually look like on your site by clicking the “Preview” button at the top right corner.
– If you have different categories for your posts, make sure to place it in the correct category by checking the box for it on the right.
– Make sure for each post, you scroll down to “Set a Featured Image” on the right and put in a corresponding image. This is the picture that will show on your main blog page when people are scrolling through all the posts.
– Once you’re satisfied with your post, go ahead and click “Publish” in the top right corner.
You’re all set! Remember, you can always go back and edit your posts too!
Making a Post- Checklist
❏ Make sure you have a title
❏ Type out and add your content
❏ Preview it to make sure it looks right
❏ Place it in the right category
❏ Add a featured image
❏ Click publish!
How to Grow/Shrink a Showit Canvas
Your pages are broken up into “canvases”, which is just the name for the different sections of a single page. You can see your different canvases by clicking on the “page” tab in the top left corner. There it will show you a list of all your canvases on that page.
You can make a canvas bigger or smaller by clicking on it, and then going to the “Canvas” tab on the right side of your screen. There you’ll see “Initial Height” followed by a number. Make the canvas taller by increasing that number, and make it shorter by decreasing that number.
***Remember to check both the desktop and the mobile version to make sure the canvas is the right size in both places!
Reordering Showit Canvases and Elements
You can change what your page looks like by switching up the order of the canvases on it. Make sure you are in the “Page” tab at the top left. It will show you a list of all your different canvases on the left. Just click and drag your canvas to where you want it to go!
The same thing happens with elements. Whatever element is at the top is going to be placed in front of the elements below it.
How to Add a Text Box
At the bottom of your screen, you should see a little box with a “T” in it. If you hover over that, it gives you the option to add a title, heading, subheading, or paragraph. These are the different settings for your font and size options.
Add the one you want, and double click to start typing.
When you add a text box, it’s always super small and annoying. Click on your text box, go over to the right hand side, and click on the tab for “Size and Position”.
On Desktop, you will typically set the width for 1,000. Then click on the little icon to center it to the canvas.
On Mobile, you will typically set the width for 280. Then click on the little icon to center it to the canvas.
You can make more changes to what your text looks like by going to the “Text Style” tab on the right and making the necessary changes there.
How to Switch Out a Photo
Change any photo on your page by double clicking on it. Your media library will then open up. You can look through the folders for images that are already there, or you can click “upload files” on the bottom left corner to upload a new photo.
Once it’s uploaded, simply click on the new photo!
How to Make Something Link to a Page
– Copy the URL of the page you want to link to
– In Showit, click on the element you want linked
– On the right hand side, find the tab that says “Click Actions”
– Under the “Type” drop down menu, make sure to chose “URL”
– Paste the URL you want it to link to in the URL field
How to Contact Showit Support

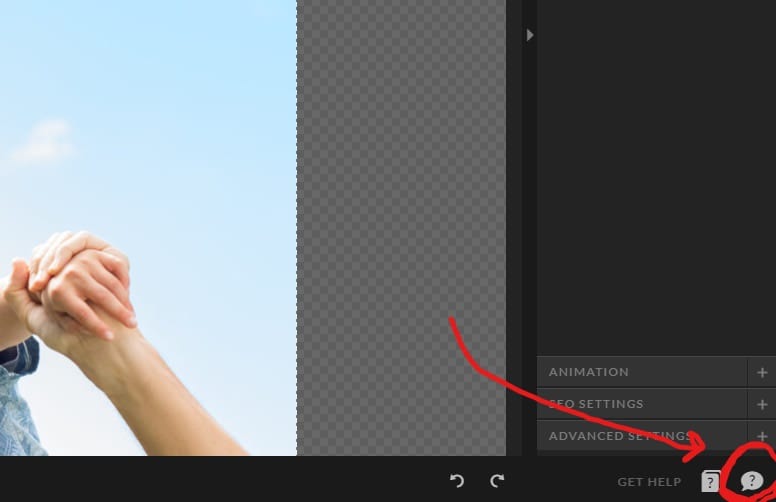
If at any point you’re confused or you get stuck on your site, you can click the little chat icon in the bottom right to contact Showit support. They usually have a ton of helpful articles they can link you to, and they may be able to help you with simple issues.
If Showit support is taking too long to answer, or if they don’t have an answer for you, their facebook user group is SUPER helpful. I definitely recommend joining the group and searching for your question or asking the users there, as there are some wonderfully knowledgeable people willing to help.
>>> https://www.facebook.com/groups/showitusers <<<
If neither of these options are working out, you can definitely feel free to reach back out to me! Now that your site is completed, I bill at $30 an hour for any additional website help. You can reach me at savannah@savvyleigh.com or (801)410-0660.
Don’t Forget
After making any updates or changes, make sure to click “Publish” in the top right corner to make your changes live! Have fun, and enjoy your new site!
-
YOU MIGHT ALSO LIKE...


Comments