Understanding Modifiers and Bounce (Flash Mini Course – Part 2/3)
Understanding Modifiers and Bounce
There’s one key concept that will help you understand all flash modifiers and techniques: the bigger the light in relation to your subject, the softer (and prettier) it is. Bigger is better. Your flash is only a couple inches across. So, why do we use flash modifiers? To make the light bigger. Why do we bounce our flash? To make the light bigger.
Think of it like the sun. You avoid shooting at high noon because the sun is super tiny and harsh in the sky. When the sun is setting, it’s a lot softer and bigger. Let’s try and recreate that same sun-setting light.
Bouncing is Best. Here’s How.
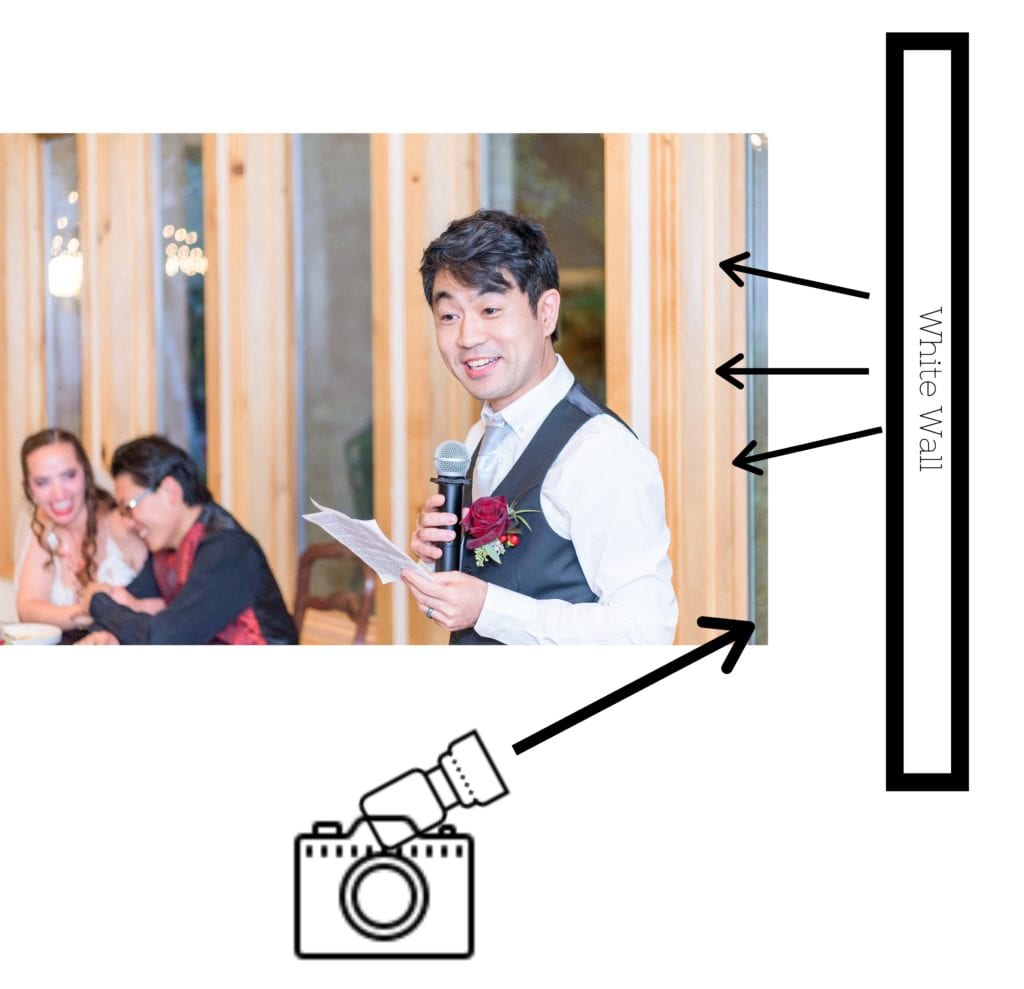
Bouncing your flash means you point your flash at a big, flat, white surface and the light bounces off of it and on to your subject. Ideally, it looks like this:
Your flash bounces off the big white wall (or ceiling) and now, the light hitting your subject is now huge and soft. It’s the size of the wall instead of the size of the flash. This is the ideal situation if you can swing it, because it’s the best way to get the light as huge as possible!
If you don’t have a giant wall or ceiling, you can try using something smaller to bounce off of, like a reflector. The smaller the surface you’re bouncing off of, the harder it is to make sure the bounce is going to hit your subjects right. One of the best ways to make sure you’ve got a good angle on your bounce is to practice with a mirror. The bounce angle is correct when your flash and your subject can both see each other in the mirror. Practice so much with the mirror that even when the mirror is gone, you can imagine it on the wall still.
When to Bounce
I try to bounce my flash whenever possible. This means if there’s a white or neutral colored wall or ceiling that’s conveniently placed, I use it. Black walls or ceilings suck up a lot of light and don’t reflect much back, so I only bounce when the wall is a light and neutral color.
You want to be careful with colorful walls, because they can bounce and leave weird colors on your subject. If you have a green wall and you bounce your flash off it, it could make the light hitting your subject a little green too.
Modifiers
When bouncing off something isn’t really possible or convenient, you put a modifier on your flash to try and control the light. Modifiers come in ALL shapes and sizes, but I’ll show you the two types I use the most.
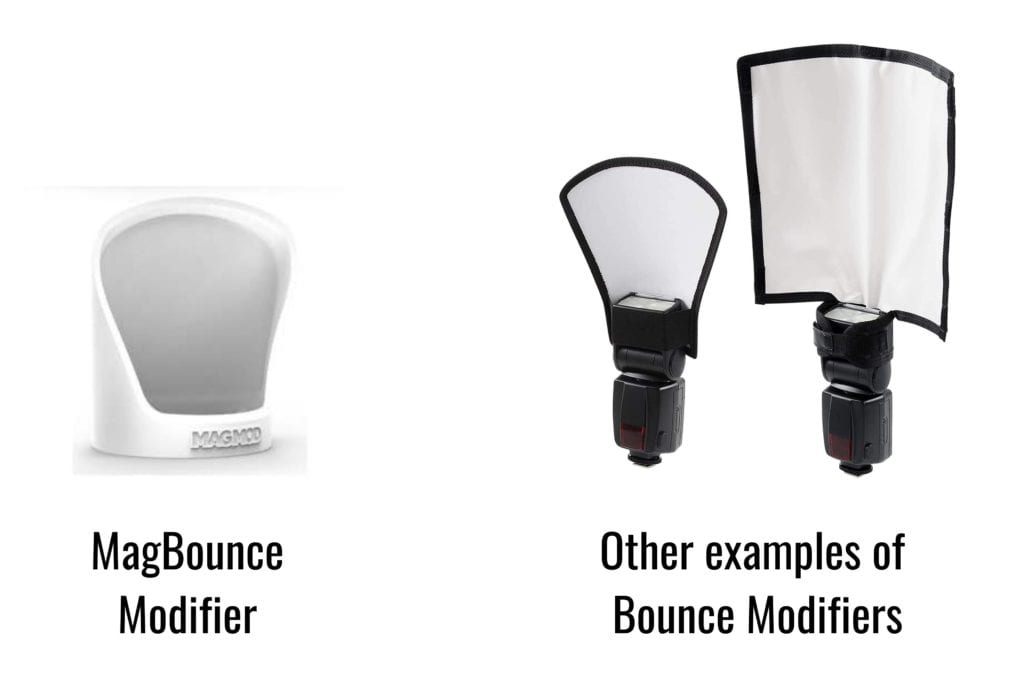
Bounce Modifiers
These are designed to try and give you something to bounce off of even when there’s nothing around. They don’t diffuse the light quite as much as other modifiers, but they’re still a really good option. I use bounce modifiers when it’s super dark outside and I need the most light possible.
My biggest gripe about some of these ones are that they can be huge and very distracting. They can also be a pain in the butt to work with. When I want a bounce modifier, I use a MagBounce because I find that the whole Magmod system is my favorite to work with.
Round (Sphere) Modifiers
These modifiers create amazing diffused light and usually aren’t too cumbersome to work with. Some people don’t like the use them because there’s a lot of light spillage with spheres. Light spill just means that there’s a bunch of light that’s not shining on your subject or background, so it’s wasted. It can drain your battery because your flash uses more power to create the same amount of light falling on your subject. Personally, I don’t care. I love spheres anyway, and I just make sure to always have extra flash batteries. Sphere modifiers are great when there’s some light in the room, but not enough. I find this is what I use the most.
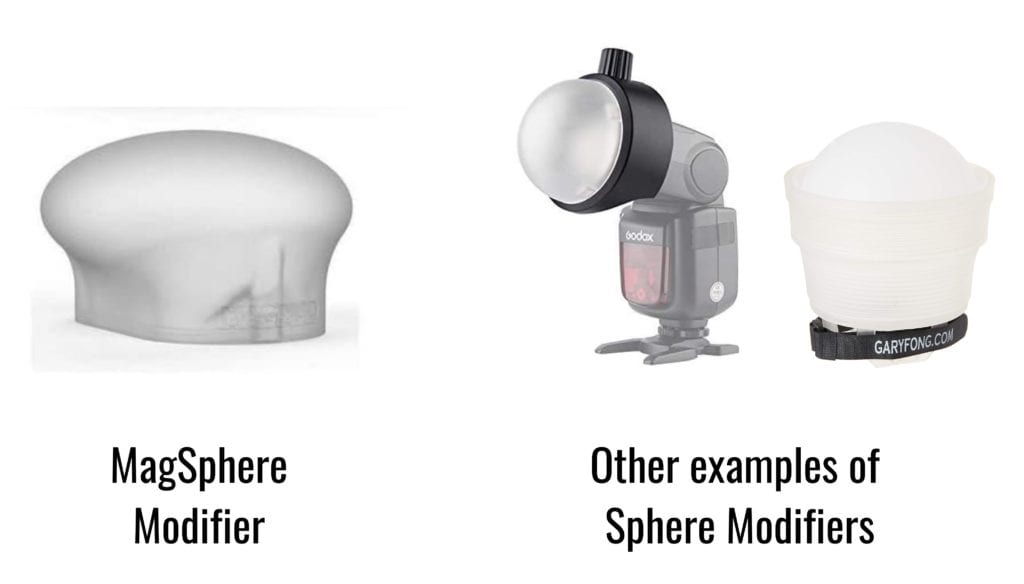
My favorite modifier (my go-to almost always) is the Magmod MagSphere. The entire Magmod system is amazing because it works by attaching a magnet band around your flash head so it’s super easy to switch out modifiers or take them on and off.
Because the MagSphere is round and covered all the way around, it means the light will be more diffused and there’s less of a chance to have weird under-eye shadows on your subject. It means that even when you point your flash straight up at the ceiling, some of the light is still hitting your subject straight in the face. It’s a great balance. If you’re going to buy any modifier, I highly suggest this one.
Snoots and Grids
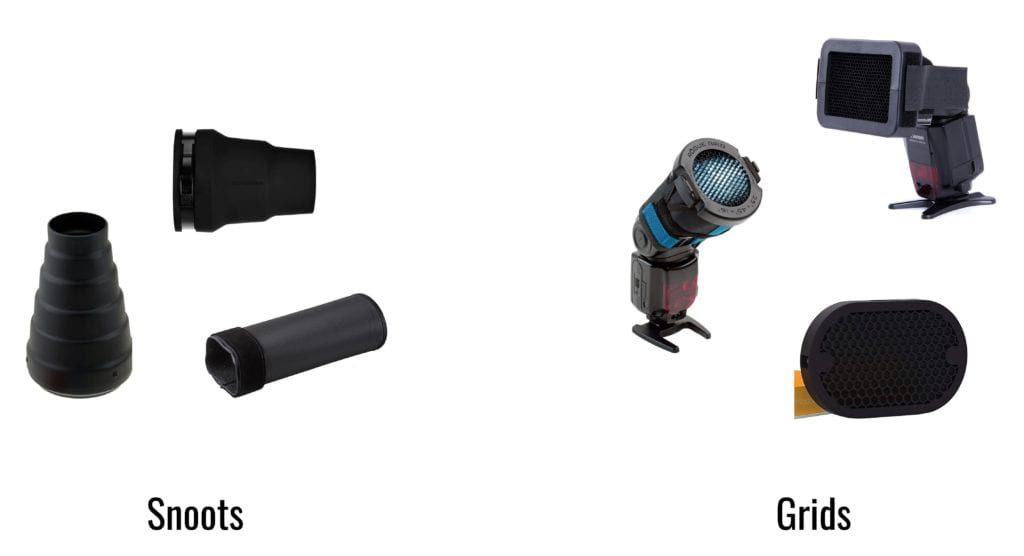
These are two really common modifiers that I don’t ever use, but I thought you should know about them because you’ll probably see them mentioned a lot. Both of them basically narrow down the light source so it hits really strongly in a smaller area. People use them to try and avoid light spill. It’s better for more dramatic and moodier shots, which is why I rarely need them for my light and airy style.
Umbrellas
Umbrellas can only be used on off-camera flashes. And although I don’t mind a bare bulb flash being visible in the back off my shot, I do mind having giant umbrellas in the back of my shot. So I really only use umbrellas when I need to put my off-camera flash in front of my subject. I’ll get into when I do and don’t use umbrellas more when we talk about reception lighting.
Umbrellas can’t go on lighting stands without some sort of adapter. I use the MagShoe because it’s super easy to put both your flash and your adapter on the lighting stand and adjust both of them super easy whenever you want. (I promise…I’m not a salesperson for the Magmod guys, I just love their system so they’re basically all I use!)
Gels
Gels are just colored pieces of transparent paper that you put over your flash to change the color of the light. The goal of gels is not to change the color of your image (that’s what your camera’s white balance is for), but to change the color of your flash to match your surroundings. For example, take this picture.
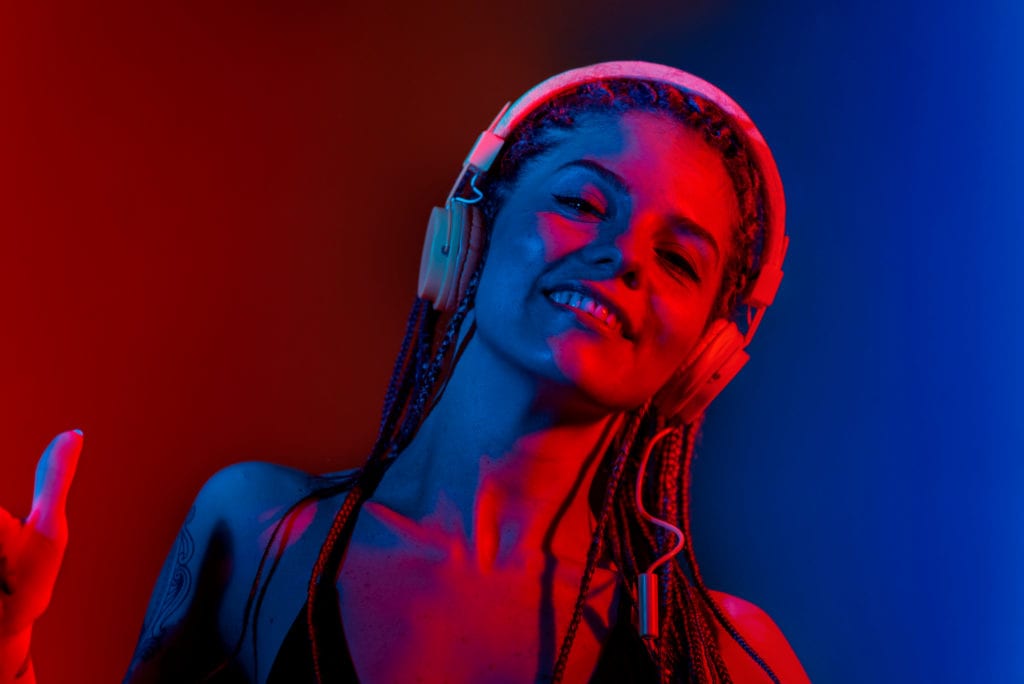
Photo purchased from Arda Savasciogullari
This is an extreme example, but it helps to illustrate the point. How would you edit this photo to get an even white balance- without the blue and the red? Would you make your photo more red to get rid of the blue? But then the red would be extra red…or would you edit to get rid of the red? But then the blue would be extra messed up…
Gels make it so you only have to fix one color. So you don’t have two colors fighting with each other. If you match your flash color to the color of the room, then you could change the white balance of the entire image to color-correct for that one color. This is super helpful in really orange barn-type venues. Make the flash orange just like the light is, and then you can change your white balance to help fix all of the orange in the photo instead of having to wrestle with an orange barn light and a blue flash light.
I also use Magmod for gels since it goes with the same magnet system and can work with all of their modifiers super well. Fortunately, gels are the easiest thing to go cheap with if you want. Just buy some transparent vellum paper for a couple of bucks and tape it on your flash. Or use a rubber band to keep it on.
You’re done with Part 2! Next we’ll use your flash and modifier knowledge to get into the best reception light setups. →
Explore the wedding world
Get my 5 favorite Engagement poses, with tips from a charlotte wedding photographer
Featured
Savvy is a wedding photographer in Charlotte, NC 28280. Offering wedding photography in North Carolina.
Contact at savannah@savvyleigh.com. Clients can text (980) 202-0886.
Copyright Savvy Leigh LLC | View our Privacy Policy
get my 5 favorite Engagement sesssion poses
Comments